How to Deploy a Node.js Application in cPanel: A Step-by-Step Guide
Deploying a Node.js application on cPanel can be straightforward if you follow the right steps. In this blog, we will learn how to deploy a Node.JS app on cPanel easily step by step. For added clarity, we’ve included snapshots to help you follow along smoothly and understand each step without any hassle.
Prerequisites
Before getting started, ensure you have the following:
- A cPanel hosting account: Ensure that your hosting provider supports Node.JS applications (Cloudexter’s Premium Web Hosting plans support Node.js application).
- A Node.js application: A fully functional Node.js app that you have built on your local machine
Production Level: Build Node Js Application
Before deploying your Node js app, you need to ensure it’s production-ready.
Step 1: Set Up Node.js in cPanel
- Navigate to the Node.js Setup Section:
In your cPanel dashboard, scroll down to the “Setup Node.js App” section.

- Create a New Node.js Application:
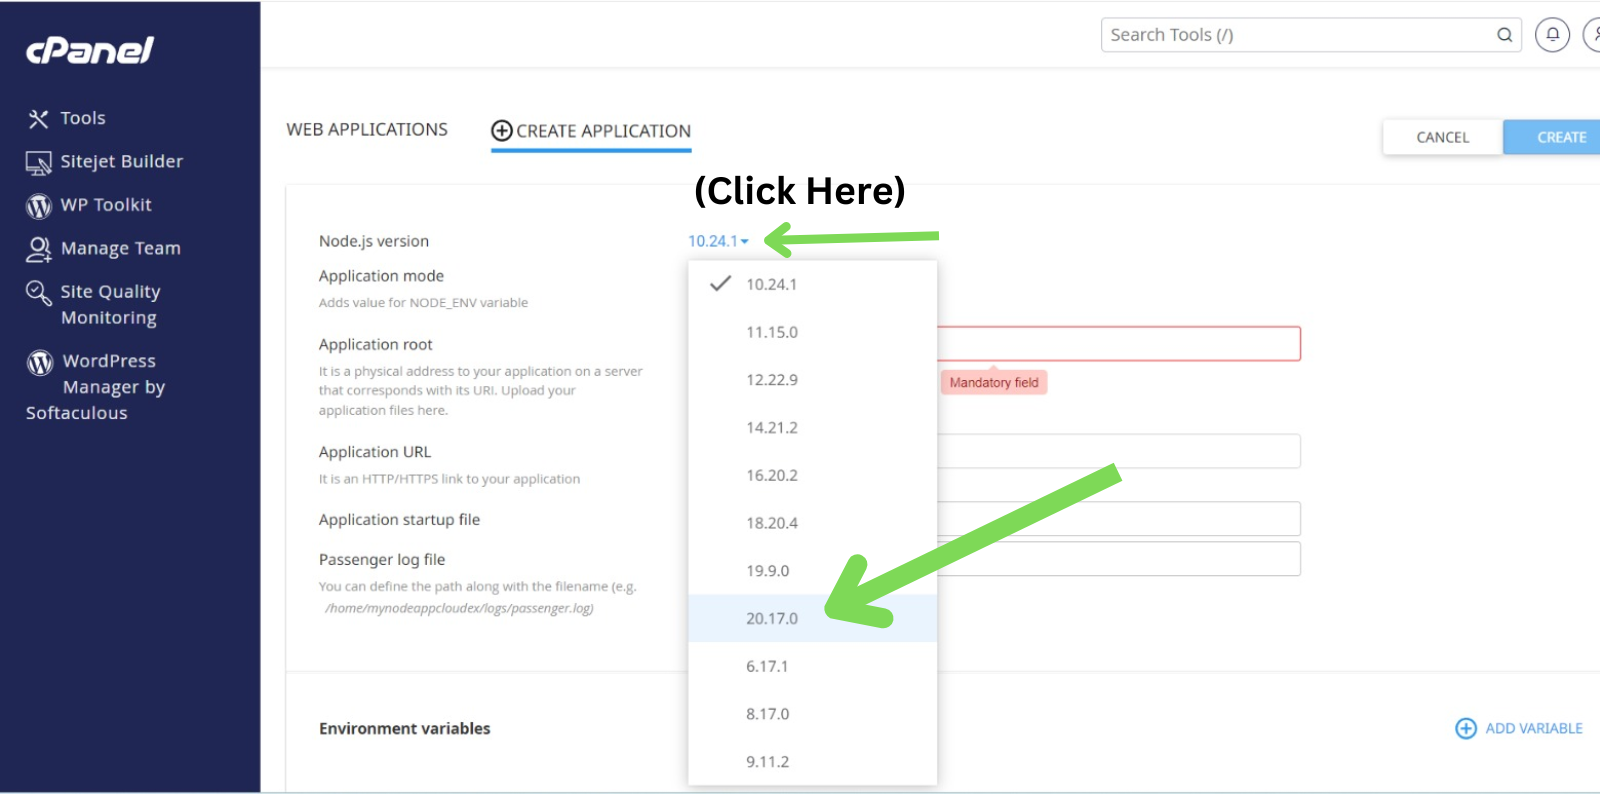
- Click on “Create Application.”
- Select the Node.js version that matches your app’s requirements.
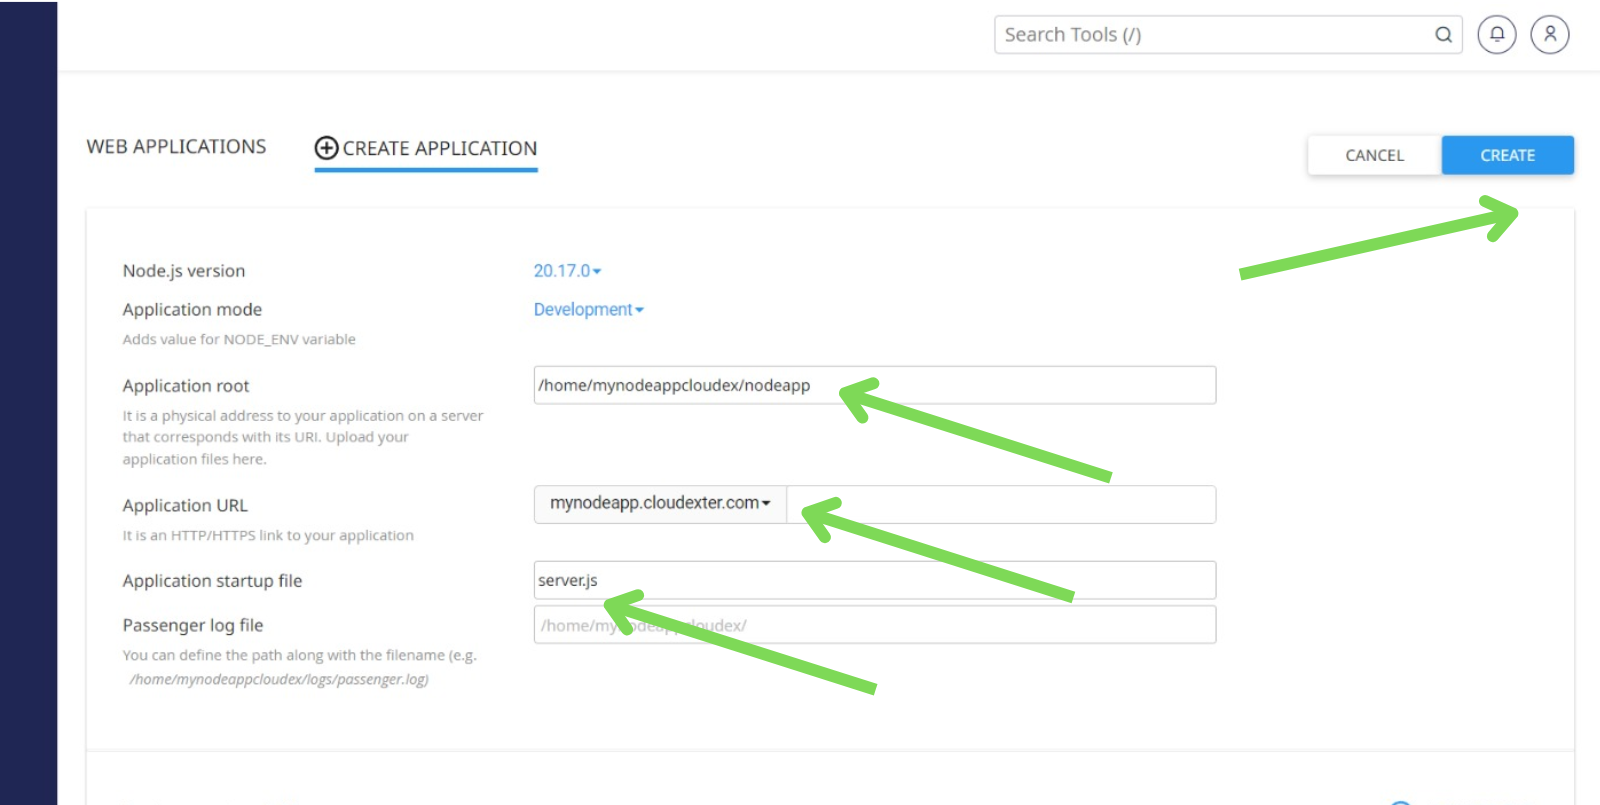
- Enter the directory name where you want to host the app.
- Select the application URL from the dropdown.
- Enter the startup file name of your application in the field of Application startup file option.
- Finally click on create button right-top corner.
Once you complete these steps, a sample Node.js application will be created.
Step 2: Upload Your Application Files to cPanel
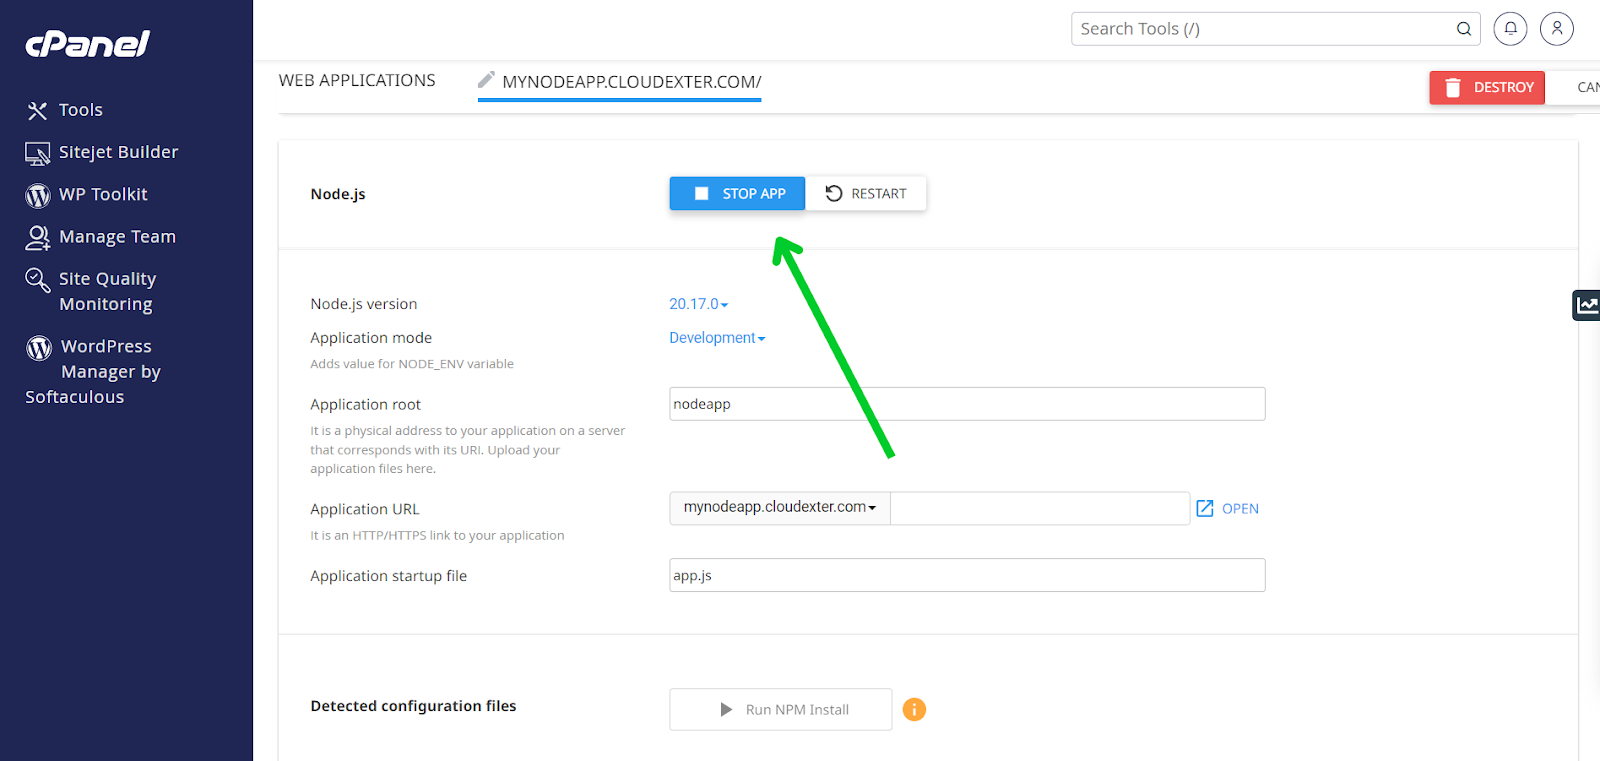
- Stop the Node.js Application:
Before replacing files, stop the current Node.js application from the cPanel interface.
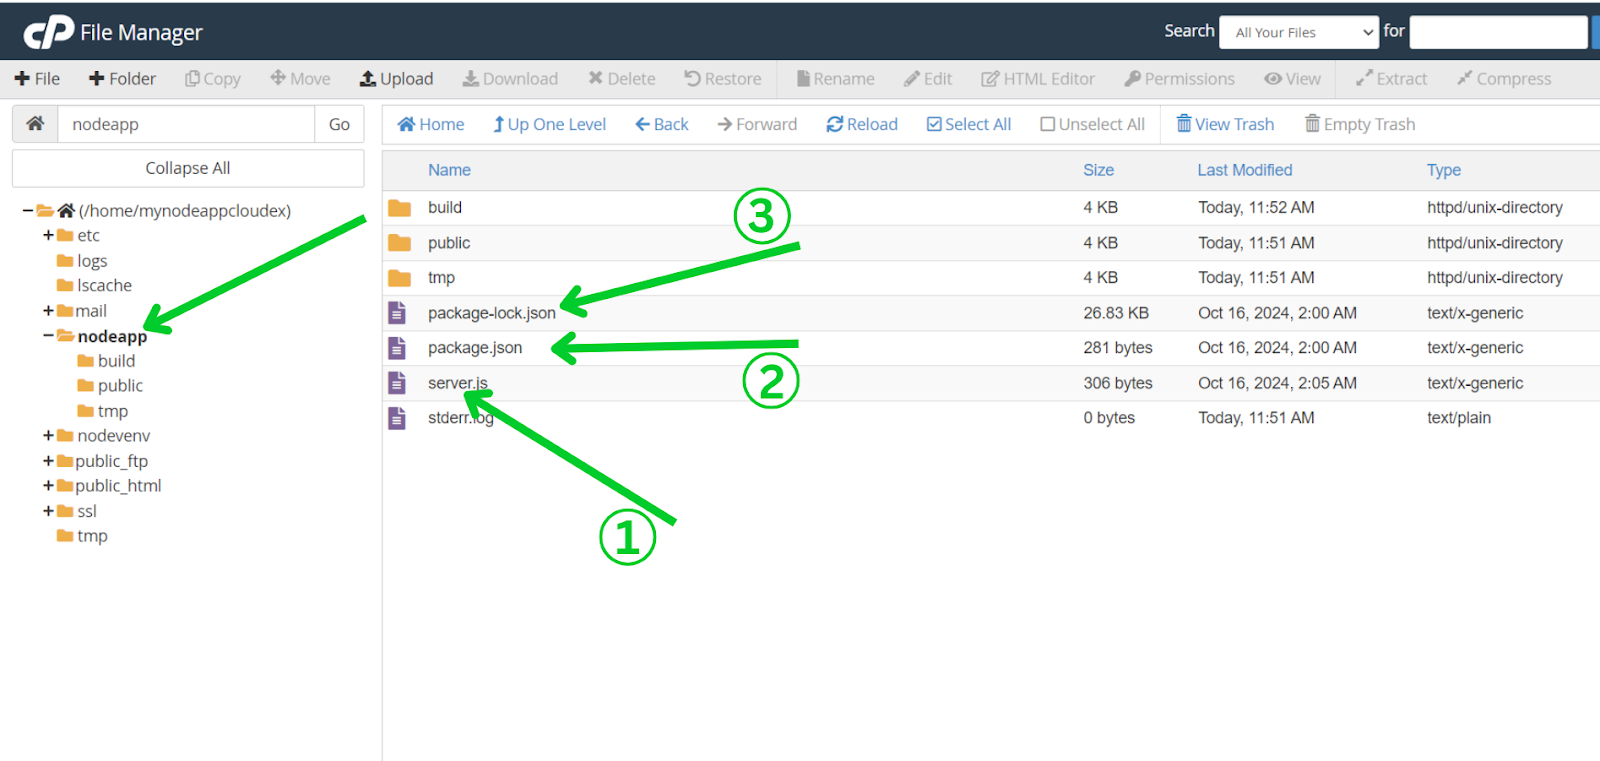
- Upload Your Node.js Application Files:
- Using the cPanel file manager or an FTP client, upload your existing Node.js application files to the same directory created earlier.
- Ensure the Node.js version you selected matches the version specified in your app’s package.json file.
- Do not upload the node_modules folder; it will be generated later.
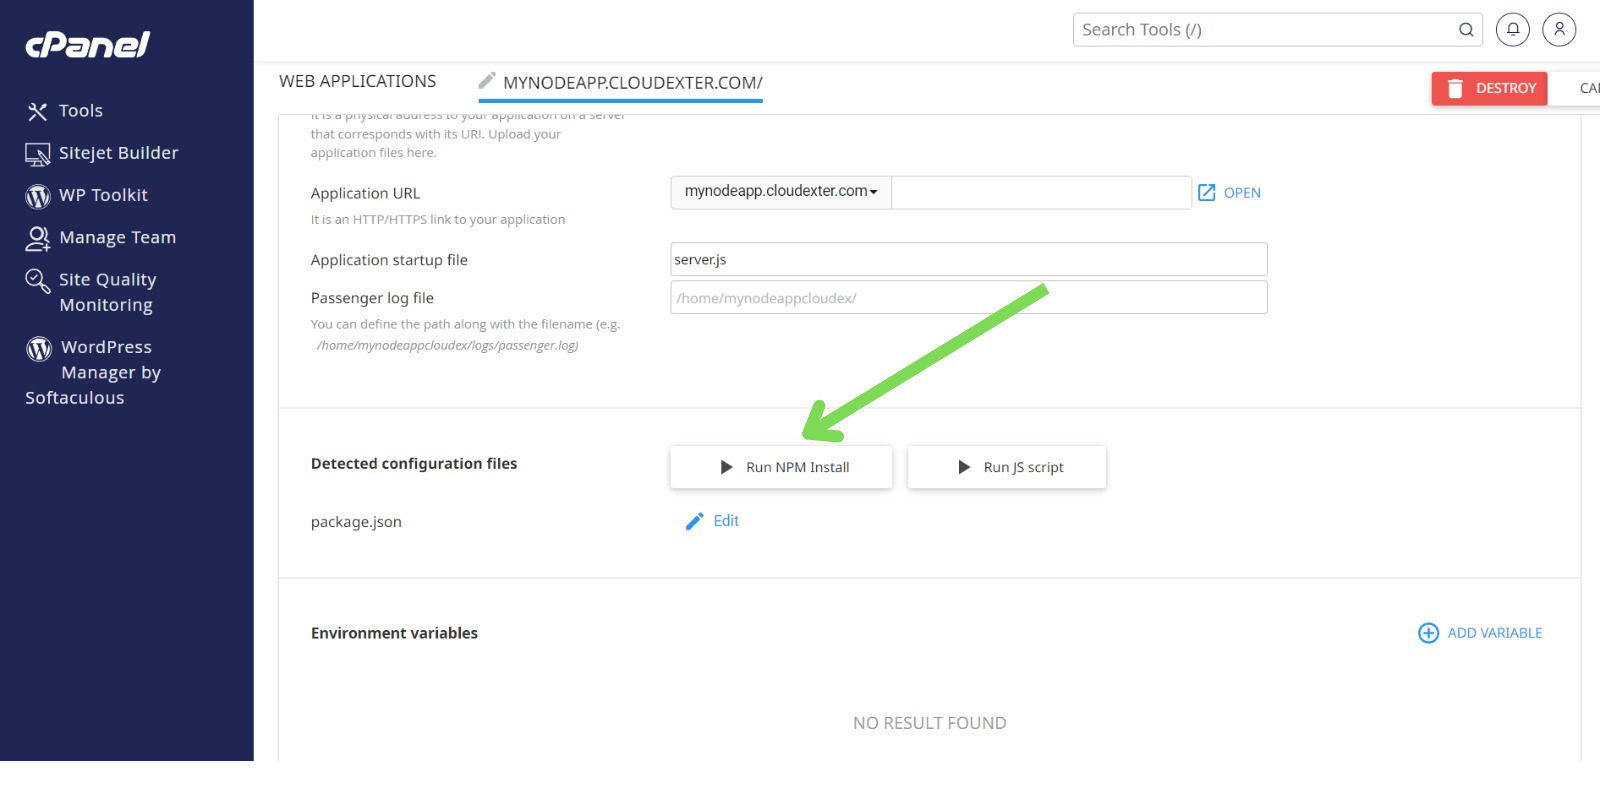
- Install Application Dependencies:
- Go back and refresh to the Node.js selector screen first.
- Click the “Run NPM Install” button to install all dependencies listed in your package.json file.
- Start the Application:
Once the dependencies are installed, start the application from the cPanel interface.

We hope that by following our steps, your application was successfully deployed. To keep receiving helpful articles like this, join the Cloudexter team and make your coding journey easier!. Cloudexter is one of India’s top hosting providers, offering cPanel hosting for projects like Node.js and Python. From purchasing to hosting, we provide full support at every step. If you’re looking for a reliable hosting provider, become a part of the Cloudexter team and improve your hosting experience!